
Knowing how to take off a commercial electrical job is the difference between electrical contractors who bid $1 million-plus tenders with confidence and those who win the job but spend the next six months learning what they missed.
Miss a home run on a 40-panel distribution job, and that error persists into your material orders, labor hours, and the number you hand the general contractor (GC).
This guide walks through the 10-step takeoff process, from reading the bid package to reconciling your final quantities.
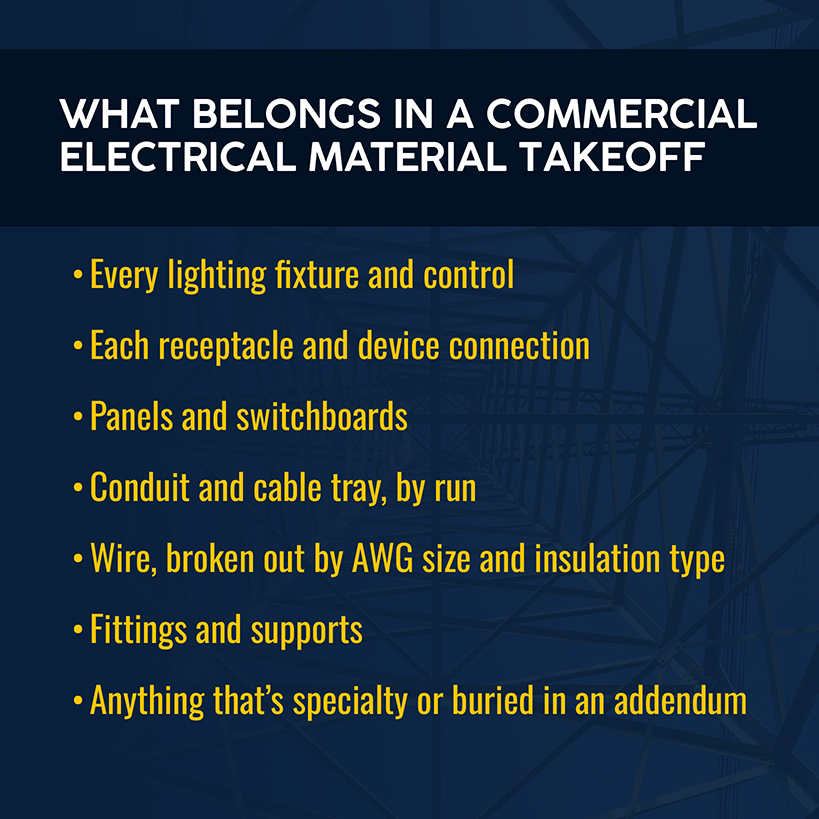
What a Commercial Electrical Material Takeoff Should Include
A commercial electrical material takeoff turns a full set of drawings and specs into a structured bill of quantities covering every part of the electrical system: devices, fixtures, panels, and length of conduits and wires.
Note that the estimate is a separate, downstream step that applies labor units, current material pricing, overhead, and profit to those quantities to arrive at a bid number. Keep the two apart in your workflow, as a takeoff error doesn't stay contained. It flows into every aspect of the bid, and no amount of skilled labor pricing can rescue a bid built on a bad count.
For a commercial property of any real size, the takeoff should account for:
- Every lighting fixture and control
- Every receptacle and device connection
- Panels and switchboards
- Conduit and cable tray, by run
- Wire, broken out by American wire gauge (AWG) size and insulation type
- Fittings and supports
- Anything specialty or easy to miss that's buried in an addendum
The worst part about overlooking these items is that the gap often doesn't surface until you're on-site.
Related: For how these quantities move into a priced bid, see our guide to the electrical estimating process.
How to Do an Electrical Takeoff, Step by Step
What follows is the electrical takeoff process, step by step. We're covering the 10 checkpoints that matter most on a commercial job of any real size, from the first read of the bid package to a reconciled, priced and ready bill of quantities.
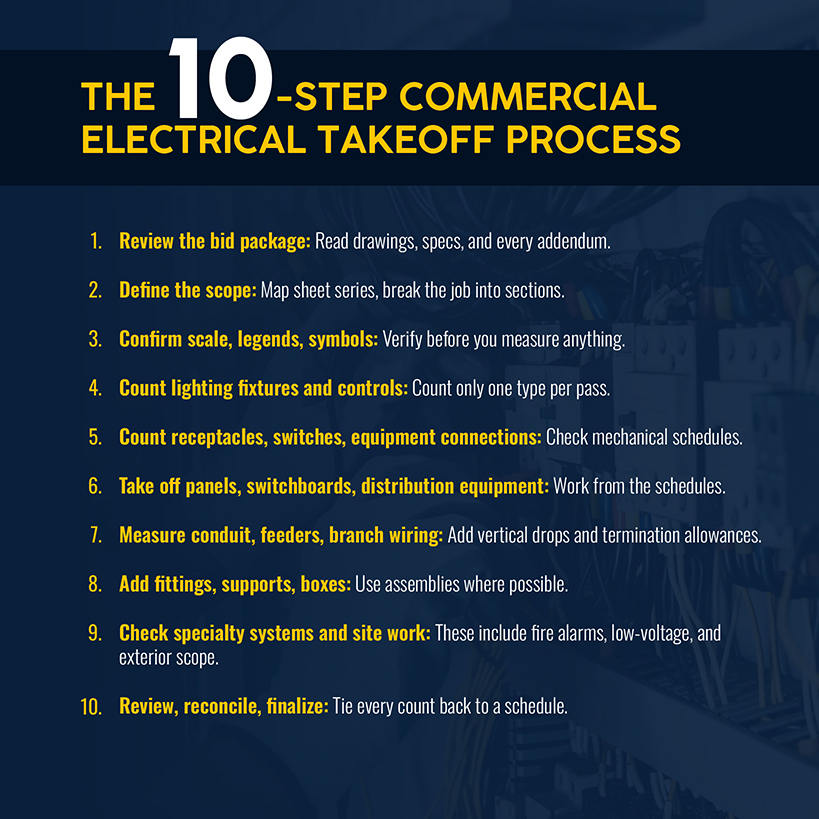
1. Review the Entire Bid Package Before Counting
Before you count a single fixture or switch, confirm the job fits your crew's capacity and risk tolerance. Then, review the specs for provisions that affect your bid, as Division 00 and Division 01 often carry bonding, prevailing-wage, or bid-leveling requirements. Then read the full E-series (floor plans, lighting layouts, power plans, panel schedules, single-line diagrams) against the electrical specifications in Division 26.
Most commercial bids include one or two addenda during the bid window, and these typically override the base drawings and specs. Skip this, and you're pricing a job that no longer exists. Check the contract's order-of-precedence clause, too, since some subcontracts give the specs priority over the drawings.
Apply version control to your project documents. Confirm you're working from the latest drawing revision, with every addendum logged in one place, before you open a plan viewer. A superseded sheet corrupts every quantity you pull from it.
2. Define the Electrical Scope and Break the Project Into Sections
The electrical scope for a commercial job rarely fits on a one-sheet series. Power and lighting are on the E-series, but HVAC and plumbing connections appear on the mechanical equipment schedule. Low-voltage and fire alarms often get their own series, while fixture mounting heights can be buried in the architectural set.
Map out which series carry electrical scope before you start counting. A hospital or lab job might involve tracking five or six series. A straightforward office tenant improvement might only have two.
Next, break the project into logical sections, whether by floor, wing, system, or however the drawing set is organized. On a job with days to bid and a set with 200-plus sheets, this approach lets you split sections across two or three estimators and reconcile the pieces without dropping scope.
3. Confirm Drawing Scales, Legends, Symbols, and Specifications
Verify the drawing scale before you measure anything. Check the scale bar against something you already know the true dimension of. A standard door is roughly 3 feet wide, and a typical stairwell bay runs 10–12 feet — if either doesn't match what the scale bar implies, the print has been resized before reaching your desk. A 20% reduction in print size can produce a matching 20% undercount in conduit footage across the job.
Confirm the scale against the title block, too, since individual sheets sometimes get reprinted at a different scale without anyone flagging it. Then work through the legend and symbol list: Engineers and architects don't always use the same conventions, and a symbol that means one thing on the power plan can mean something else on the fire alarm riser diagram.
Measure one known dimension on every sheet, but not just the first one in the set.
4. Count Lighting Fixtures and Lighting Controls
Proceed one fixture type at a time. Pick a single symbol, whether that's a 2x4 recessed troffer or an exit sign, and go through every sheet before switching to the next type. Mark and transfer the count onto your takeoff sheets as you finish each drawing, noting which sheets are done.
Mixing fixture types in a single pass is how estimators end up with double-counted and missed items on the same drawing.
Once a fixture type is fully counted, reconcile it against the lighting fixture schedule. If your count and the schedule differ by more than 2–3%, trace the difference rather than rounding it. On multi-story commercial buildings, count from the electrical sheets, which govern quantity, rather than the architectural reflected ceiling plan, which is for coordination and can lag the latest electrical revision.
Lighting controls, occupancy sensors, dimming panels, and low-voltage relay systems deserve their own pass, too, as they're easy to undercount when everyone's paying attention to the fixtures themselves.
5. Count Receptacles, Switches, Devices, and Equipment Connections
Power devices follow the same one-type-per-pass discipline: receptacles, switches, and data or comm outlets each get their own pass. Your switch count should reconcile against the device schedule, just as you would with lighting.
Then, move to equipment connections, where scope most often slips through the cracks. HVAC units, kitchen equipment, and process machinery typically get their electrical connection requirements called out on the mechanical or equipment schedules rather than the power plan itself, so an estimator working from the E-series alone can miss or under-scope them.
Cross-reference every piece of equipment on the mechanical and equipment schedules against your device count. An uncounted rooftop unit with a disconnect and whip won't show up as a mistake until the electrician gets to the roof and finds nothing budgeted for it. On a midsize tenant improvement with 15–20 pieces of HVAC and kitchen equipment, that's easily a few thousand dollars that never made it into the bid.
6. Take Off Panels, Switchboards, Transformers, and Distribution Equipment
The panel schedule is the authoritative source for circuit count in every panel on the job. Every circuit listed on it should trace to an identifiable home run on the floor plan. Take off panels, switchboards, and transformers by size, amperage, and configuration from the schedules and single-line diagram rather than counting boxes on the floor plan, which shows location but not electrical specification.
Feeder sizing and quantities come from the one-line diagram, not the floor plan, since the one-line is the schematic authority. Price feeders as their own line items rather than folding them into general wire and conduit totals. A 4/0 aluminum feeder running 200 feet to a subpanel carries different labor costs and material pricing than the same footage of branch-circuit wire; lumping them together makes your cost data less useful next time.
Related: Our guide to electrical KPIs that protect margin covers which numbers to watch as the job moves from bid to build.
7. Measure Conduit, Feeders, Branch Wiring, and Cable Tray
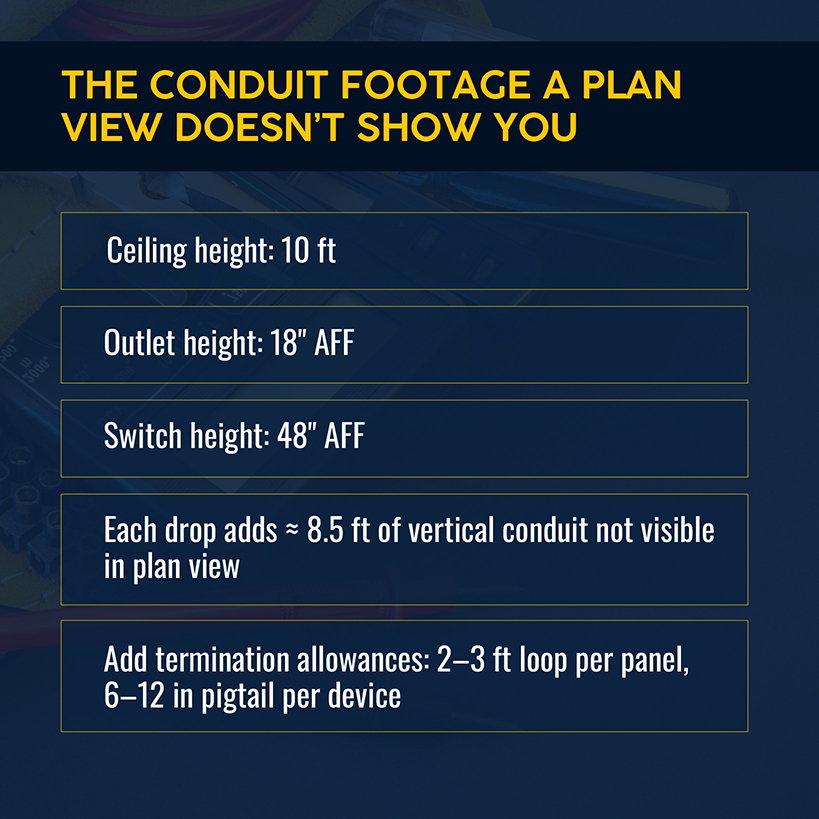
Plan-view conduit runs only capture horizontal distance. Every vertical drop from ceiling to device height has to be added, but that's easy to miss when working fast across a big sheet. Outlets typically land around 18 inches above a finished floor, with switches landing around 48 inches. On a job with a 10-foot ceiling, each drop adds roughly 8.5 feet of vertical conduit you don't see in plan view.
Wire footage equals conduit length multiplied by the conductor count per circuit, plus termination allowances. That means a 2–3-foot loop at each panel and a 6–12-inch pigtail at each device. Those allowances sound small individually, but they can add 20–40 feet to a single home run in total.
Break wire out into separate line items by AWG size and insulation type. #12 THHN covers standard 20A branch circuits, #10 THHN covers 30A and many HVAC feeds, and #8 and larger THHN/XHHW covers your feeders. A blended wire total hides the real cost variance between these options.
8. Add Fittings, Supports, Boxes, and Installation Accessories
Fittings, straps, hangers, boxes, and connectors are the small electrical components that rarely get their own line item on a floor plan. But they still attach to every device and conduit run you've already counted.
This is where assemblies save real time, as bundling a device with its box, connectors, and mounting hardware into one pre-priced unit beats manually adding a box and two connectors for all 400 receptacles on a job.
If you're still pricing devices individually, use your job history to build a standard accessory allowance per linear foot of conduit and per device type. Apply it consistently. Perfect precision on every strap and hanger isn't the goal. What matters is that the category doesn't disappear from the takeoff.
Related: Follow up on this by reviewing our best practices for electrical inventory management.
9. Check Specialty Systems, Site Work, and Easily Missed Scope
Specialty systems and site work are where commercial takeoffs lose the most money, as they're easy to skip when moving quickly. Fire alarm, low-voltage, security, and AV systems — the voltage systems that run separately from main power distribution — often have their own sheet series and can be missed by an estimator working straight through the power and lighting plans.
For example, site work (exterior and parking lot lighting, underground feeders, temporary power) might only show up on the civil or site plans, not the E-series.
This is a good place to cross-check the panel schedule against your home run count once again. If a circuit is listed on the schedule but doesn't match an identifiable home run on any floor plan, log it as a request for information (RFI) in your bid-clarification letter rather than assuming it's covered somewhere. A miss here can result in a change-order dispute months later that jeopardizes your margin.
10. Review, Reconcile, and Finalize the Material Takeoff
Before you hand the takeoff off for pricing, run a final reconciliation pass. Every device count should tie back to its schedule, every panel circuit should trace to a home run, and every RFI should be logged in one place rather than scattered across sticky notes.
Total your wire footage by AWG size, and check it against your conduit totals. A ratio wildly out of line with a similar job you've bid before is worth a second look.
The output of this step is a clean, error-free bill of quantities that's organized by category and ready to be priced. This is the foundation your estimate gets built on — and the last place a mistake is cheap to catch.
Related: From here, our electrical estimate template can help you turn that bill of quantities into a formal bid.
Turn the Completed Takeoff Into a Reliable Commercial Estimate
A finished takeoff is only as useful as what happens to it next. If your bill of quantities and pricing are in two different spreadsheets, you're relying on manual methods that lead to unnecessary re-entry and potential errors.
That starts with labor units. The NECA Manual of Labor Units has been the electrical industry's standard labor-estimating reference since 1923, covering installation labor for nearly every item type. Each line item carries three columns: Normal, Difficult, and Very Difficult. The Labor Factor Score Sheet will help you pick the right one.
Note that these units exclude supervision, which gets estimated and added separately. Layer in adjustments for real job-site conditions, such as building height, congestion, weather, and shift work.
Material pricing is the riskiest component right now. Copper is the dominant cost driver in wire and cable takeoffs, and it's been trading at record highs amid the prospect of additional tariffs. Build in a material contingency on copper-heavy line items, and shorten your bid-validity window in volatile stretches.
Simpro® Takeoffs is a cloud-based tool that lets you count symbols and mark up drawings without switching programs, syncing quantities straight into a Simpro Premium quote. SPARX Electrical Pre-Builds bundles parts, labor fit times, and actual supplier pricing into ready-to-use assemblies, scaled up to $50 million-plus commercial projects, while Simpro's catalog sync keeps that pricing current rather than stale.
Norberg Electric saw its estimate creation time shrink from 1 hour to 10 minutes after switching. And Ben Edwards of BGE Digital Security says this technology helps the company produce quotes 10x faster than working from spreadsheets. Simpro customers broadly enjoy 10x faster estimates and 25% revenue increases.
Related: For more on using AI for faster, more accurate electrical estimating, see our guide to protecting revenue and margins with AI.
Build a Repeatable Takeoff Process for Every Commercial Bid
Takeoffs aren't a one-time exercise. The contractors who consistently win $1 million-plus commercial electrical work treat takeoff as a standardized process — every estimator follows the same process rather than relying on memory.
Treat takeoff discipline as a project management function rather than an individual habit. Standardize your device counting order, reconciliation checkpoints, and labor-factoring adjustments. You'll spend less time reinventing the wheel on every bid and more time on the labor judgment and risk pricing that separates winning, profitable bids from bad ones.
The discipline you build into one takeoff should carry through every estimator and every bid that comes after. Schedule a demo to see how Simpro can fit your process.
FAQs
Who usually completes a commercial electrical takeoff?
For most commercial electrical contracting businesses, a dedicated estimator or small estimating team handles takeoff, sometimes supported by a project manager or senior electrician who reviews the count before it goes to pricing. On $1 million-plus tenders, multiple estimators might split the drawing set by section and reconcile their counts before the takeoff is finalized.
How accurate should an electrical takeoff be?
Most experienced estimators keep any single device count within 2–3% of the fixture or panel schedule. Bigger discrepancies are treated as something to trace rather than round away. Takeoff errors compound downstream, and every extra bit of drift moves you further from an accurate estimate. The accuracy bar on a $1 million-plus commercial job is meaningfully tighter than on smaller service work.
How should estimators handle incomplete electrical drawings?
Log every gap as an RFI rather than assuming coverage you can't verify. If a panel schedule lists a circuit with no visible home run, or a piece of equipment on the mechanical schedule has no electrical connection shown anywhere on the E-series, flag it in your bid-clarification letter. Failing to flag issues is one of the most common ways to turn a takeoff error into a change-order dispute down the line.
What skills are needed to complete a commercial electrical takeoff?
Takeoff is fundamentally about drawing literacy and measurement discipline. It's a distinct skill set from the labor judgment and market pricing required in estimating. A strong takeoff estimator can read a full commercial drawing set, cross-reference schedules against floor plans, apply NECA labor-unit logic, and catch the kind of scale or scope errors that only register once you know what a standard commercial job looks like.


 Back to top